Salute men!
Desperate times demand desperate measures, and as you will see Frame 3 means we're going to risk a lot to try and equilize the situation at Leyte. I believe that it will be difficult for us to win this war, however, we can still cause a draw and that is what we're going to try and achieve. Note that if the Japanese have no moveable carriers, then they cannot win. Therefore we will work to IMMOBILIZE their carriers rather then destroying them outright.
For this to succeed, we must put 24 hits into 2 carriers in Frame 3. We will carry bombs again (4 each!) since we can dive bomb better then we can drop torps. This means 6 TBFs need to get to each carrier. This time, the TBFs will be escorted and a smaller force of defenders will be left at our own carriers (this is the big chance we need to take).
The weather is on our side, early reports show a major monsoon brewing. This means poor visibility and should allow our TBFs to get closer before being spotted. Of course it also means the Japs can get to our carriers undetected but that's the risk we have to take.
Our intelligence shows that only 4 betties will be available this frame to the Japs, this means 16 bombs, not enough to sink any one carrier. Therefore we will IGNORE the high alt betties and concentrate on the Vals and Kates instead. Of course if the betties come in low, we have to get them, they may be making torpedo runs.
The TBFs will take off from their carriers and meet at the assigned Rendevous Point. There they will also be met by their escorts. We will proceed to 5Carrier, 7Carrier, 6Carrier, and/or 4Carrier as necessary. We know at least one Japanese carrier is in the lower half of the map. Our goal is to get 6 TBFs to 2 of their boats.
Bad news is we took some attrition and get no replacements for our F4Us or F6Fs. We lost a total of 3 F6Fs and 4 F4Us. Therefore VF-18C will fly F4Fs this time and each VF-11B will have 1 F6F and 3 F4Fs.
Here are the specific orders. Those of you who won't be able to make it to this frame, please make sure you chose a replacement (they can be walkons if you know they're good!) and that they get and understand these orders! It is YOUR duty as GL to find replacements, not mine or Ralls.
NOTE: AWULF of VF-18C will have the overall command of defenses!
There will be five flights:
Condor (offense):
VF-18A (fz, 4 f4U), VF-18B (lemur, 4 f4u)SeaLion (offense):
TBFs: VT-18A (gnatz), VT-18B (whels), VT-11A (kken), VT-11B (han)Walrus (offense):
F4F close escorts: VF-19A (modas), VF-19B (smitty), VF-19C (toad!)
TBFs: VT-9A (rall), VT-9B (turtl), VT-19A (boa), VT-19B (wezul)Badger (defense):
F4F close escorts: VF-9A (bevis), VF-9B (bigH)
VF-11A (Hornet, 4 F6Fs), VF-11B (Seph, 1F6F + 3 F4Fs), VF-11C (HW, 4 F6Fs)Eagle (defense):
VF-18B (Awulf, 4 F4Fs)
CONDOR ORDERS:
Lemur has lead. 100% fuel. Proceed to 17,8,4. Climb to 30K. Stay at RP until ordered to move. You will be moving just in front of the main offensive force, you are to engage ALL enemy fighters. Use smart F4U tactics and don't get into turn fights! Proceed to 5Carrier, 7Carrier, 6Carrier, and/or 4Carrier as ordered. Report arrival at each carrier and enemy forces present. Proceed only when ordered!SEALION ORDERS:
Gnatz has lead. 100% fuel, 4 bombs. Proceed to 17,8,9. Climb to 15K (TBFs), 20K (F4Fs). Stay at RP until ordered to move. Proceed to 5Carrier, 7Carrier, 6Carrier, 4Carrier as ordered. Stay at 15K until within sight of the carrier. Have at least one pilot aim directly for the ack. MAKE SURE YOU ATTACK THE CORRECT CARRIER. Some of the targets have multiple carrier ships, but only one of them actually counts. Review your maps. Remember to use /*f to determine correct approach to target.WALRUS ORDERS:
Rall has lead. 100% fuel, 4 bombs. Proceed to 17,7,3. Climb to 15K (TBFs), 20K (F4Fs). Stay at RP until ordered to move. Proceed to 5Carrier, 7Carrier, 6Carrier, 4Carrier as ordered. Stay at 15K until within sight of the carrier. Have at least one pilot aim directly for the ack. MAKE SURE YOU ATTACK THE CORRECT CARRIER. Some of the targets have multiple carrier ships, but only one of them actually counts. Review your maps. Remember to use /*f to determine correct approach to target.BADGER ORDERS:
Awulf (EAGLE) is the defensive co-ordinator. 100% fuel.EAGLE ORDERS:
VF-11A will position at 17,16,5 at 35K (three five)
VF-11B will position at 16,19,5 at 25K (two five)
VF-11C will position at 19,14,5 at 35K (three five)
100% fuel. Set up 4 patrols at 15K.Channel and briefing room assingments are posted. See maps below for recon by rj30.
patrol 1: 15,20,5 - 18,20,5
patrol 2: 14,19,7 - 14,17,1
patrol 3: 15,16,5 - 18,13,5
patrol 4: 20,13,5 - 21,10,5Your job requires major discipline. If *MULTIPLE* counters are spotted, head to the sector they are spotted in and recon the altitudes of the bombers (do not chase lone counters, they are Ki scouts). Do not engage. Call out locations and alts to available BADGER units and vector them in.
AWULF you will be co-ordinating all the BADGER flights.
Good luck men!
~Boa
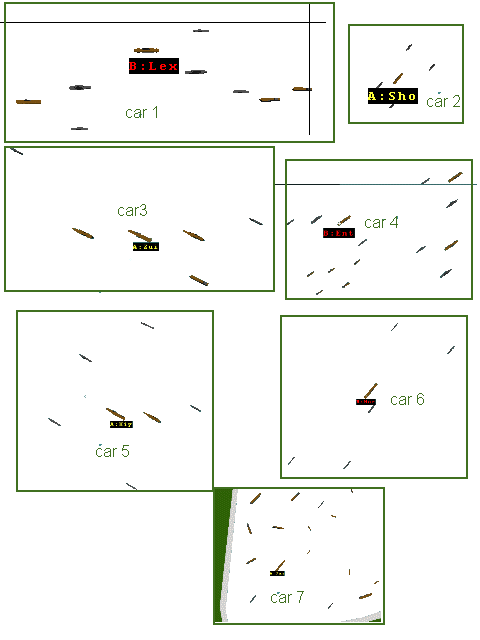
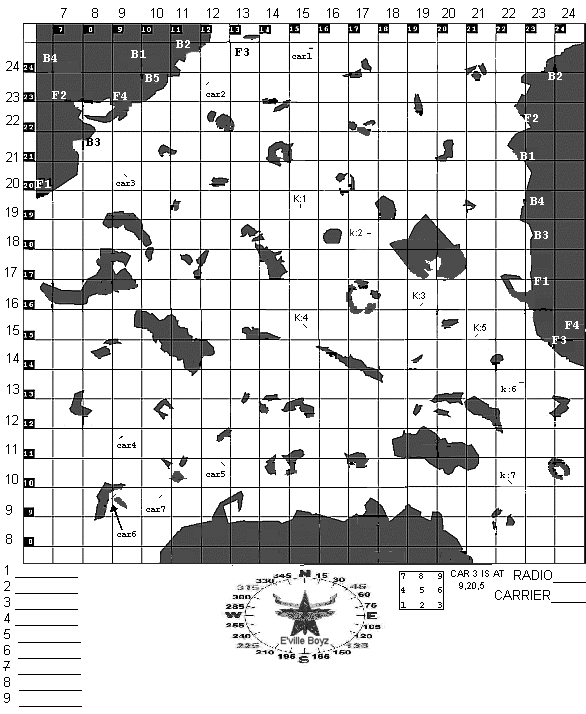
[situation map] [recon]